How To Optimize Your Smartphone Camera Settings For Social Media
The Importance of Proper Camera Configuration
Every creator wants their feed to look professional and engaging, but high-quality content starts long before you reach the editing app. Knowing how to optimize your smartphone camera settings is the secret sauce for creators who want to stand out in a crowded social media landscape. You do not need a massive DSLR to capture stunning, high-quality images because the technology in your pocket is already incredibly capable.
Many users default to the automatic settings, which are designed for general utility rather than creative control. Taking a few minutes to adjust your phone's configuration ensures your photos and videos have the right lighting, depth, and clarity for your brand. This simple shift in approach can be the difference between a blurry, dark post and content that stops the scroll immediately.
How to Optimize Your Smartphone Camera Settings for Sharpness and Exposure
The most important step in capturing high-quality content is mastering your exposure control. If your photos frequently look too bright or too dark, it is likely because your camera is struggling to determine the right light balance for your scene. When you tap on your screen to focus, you will see a small sun icon or a slider appear, which allows you to manually adjust the exposure levels before you press the shutter button.
You should also familiarize yourself with the focus lock feature, which prevents the camera from constantly hunting for a new focal point. By tapping and holding your finger on the subject you want to capture, your phone will lock the focus and the exposure, ensuring a consistent look across multiple takes. This is essential when you are filming or shooting content where the lighting or background might change slightly.

Mastering Grid Lines and Composition
Composition is the invisible framework that guides a viewer's eye through your content. Most modern smartphones have a grid feature that overlays two horizontal and two vertical lines across your screen, breaking the frame into nine equal segments. This is based on the rule of thirds, a fundamental principle of photography that suggests placing your subject along these lines or at their intersections creates a more balanced and interesting image.
Using these grid lines helps you avoid crooked horizon lines, which can make your photography look amateurish and distract from the subject. For landscape shots, align your horizon with the top or bottom line rather than splitting the image right in the middle. Applying this simple visual aid transforms flat, ordinary shots into professional-looking compositions that perform better on platforms like Instagram and TikTok.
Choosing the Right Aspect Ratio and Resolution
Social media platforms have very specific requirements when it comes to how content is displayed on different device screens. While the classic 4:3 aspect ratio is great for general photography, it might not be the best choice for a full-screen mobile experience. Utilizing 9:16 for vertical stories or Reels allows your content to occupy more screen real estate, which increases viewer retention and engagement.
You should also check your settings to ensure you are shooting at the highest resolution your phone supports, especially if you plan to do heavy cropping or editing later. However, be mindful that higher resolution files take up more storage space and can make uploading more difficult if your data connection is weak. Balancing quality and file size is key, so consider dropping down slightly if you are filming extended video content for a platform with lower upload limits.
Utilizing Built-in Pro or Manual Modes
If you want total creative control, move away from the basic photo mode and explore the pro or manual settings on your smartphone. These modes allow you to manually adjust critical variables that automatic settings usually determine for you, such as shutter speed, ISO, and white balance. These tools are invaluable for specific lighting situations, such as shooting at night or capturing fast-moving action.
For example, a lower ISO will result in a cleaner image with less digital noise when shooting in well-lit areas, while a faster shutter speed is necessary to freeze movement. Learning to manipulate these variables might take some experimentation, but the payoff is professional-grade control over the final look of your content. Once you start utilizing these settings, your ability to capture consistent, high-quality images will improve significantly.
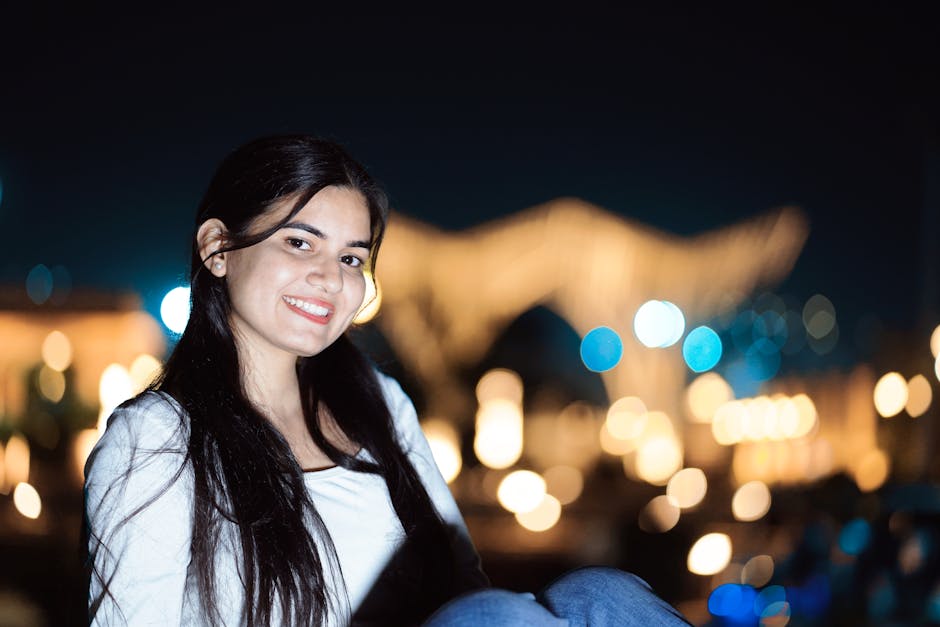
Mastering Focus and Depth of Field
Creating a professional look often involves isolating your subject from a distracting background. Portrait mode is the most common way to achieve this, using software to mimic the shallow depth of field you would get with a dedicated lens and a large aperture. This creates a pleasing blur, known as bokeh, that makes your main subject pop, which is perfect for food photography, product shots, or influencer portraits.
- Adjust the aperture: Most phones allow you to change the level of blur even after the photo is taken.
- Keep your distance: Ensure your subject is not standing too far from the camera for the effect to work properly.
- Use it selectively: Do not use portrait mode for everything, as it can occasionally blur edges of the subject incorrectly.

The Simple Habit of Cleaning Your Lens
It sounds incredibly basic, but cleaning your camera lens is the single most effective way to improve your smartphone photography. Because we carry our phones everywhere, the glass covering the camera sensors quickly accumulates oils, dust, and fingerprints. This layer of grime acts like a filter, creating unwanted lens flares, lowering contrast, and making your images look soft or hazy.
Make it a habit to wipe your lenses with a microfiber cloth before every single shooting session. Do not just use the hem of your shirt, which can often be abrasive or leave behind tiny fibers that make the problem worse. This simple, two-second action ensures your camera is capturing the sharpest, clearest light possible, instantly giving your photos a more professional edge without needing any extra equipment.