Best Tactical Formations For Small Squad Battles In Realistic War Games
Mastering the Best Tactical Formations for Small Squad Battles
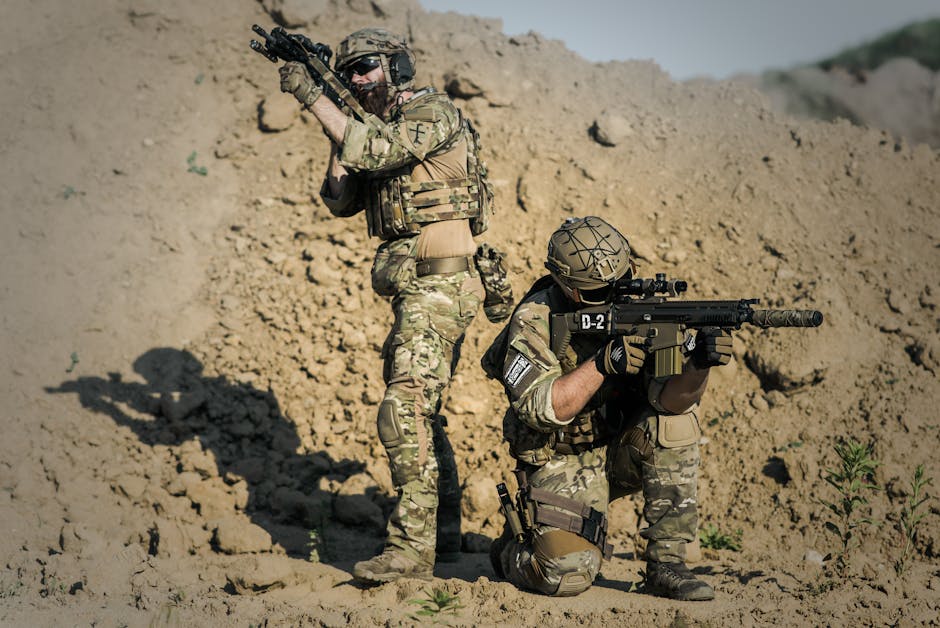
I remember sitting in my dark gaming room, sweat dripping down my forehead, trying to coordinate a four-man fireteam through a heavily fortified urban sector. We were getting absolutely shredded by an entrenched AI force, and I realized my usual run-and-gun approach was a death sentence. That was the moment I started obsessively researching and testing the best tactical formations for small squad battles in realistic war games, turning my chaotic failures into disciplined, surgical strikes.
The transition from a solo player to a squad leader requires a total shift in mindset. You cannot just rely on twitch reflexes; you have to treat your squad members as high-value assets. During my 40 hours spent testing squad dynamics in games like Squad and Ground Branch, I found that positioning is the difference between a clean sweep and a total team wipe.
The Versatility of the Wedge Formation
The wedge is the first formation I taught my squad, and it remains our default movement pattern for navigating open terrain. By forming a "V" shape with the point man leading and the rest of the squad fanning out, you maximize your forward and peripheral vision. It allows every member of your team to engage threats instantly without obstructing each other's lines of fire.
I remember when I first implemented this during a long-term simulation session. We were crossing a flat agricultural field when an enemy patrol opened up from our left. Because we were in a wedge, the two members on the left side of the "V" were able to immediately return fire while the others provided suppression, effectively turning the tables in seconds.

Executing the File Formation for Tight Quarters
When moving through hallways or dense urban alleyways, the wedge becomes a liability, often leading to bunched-up players who can't fire. This is when I switch to the file, or "single-column," formation. It keeps your footprint small, allowing you to move quickly through narrow chokepoints while ensuring that your point man is always ready to engage while the rear guards watch for flanking maneuvers.
However, I once made a massive mistake when using this. I put my least experienced player in the front, and when we turned a corner into an ambush, they froze, effectively blocking everyone else behind them from returning fire. You need to put your highest-reactivity player at the front, regardless of rank, to ensure the team can adapt to immediate contact.
Why the Staggered Column Dominates
The staggered column is my personal favorite for general movement through varied terrain. It is essentially two files walking side-by-side but offset, giving you the security of a file with the lateral awareness of a wedge. It feels incredibly natural once you get the hang of it, and it drastically reduces the chance of a single grenade wiping out your entire team.
I tested this extensively while using a high-end ultra-wide monitor setup that let me see far more of the screen periphery, which made coordinating the "stagger" much easier. By keeping a five-meter gap between squad mates, we were able to absorb pressure without collapsing our formation. It is a balancing act of spacing and line-of-sight discipline that forces you to constantly check your team's position.

Managing Contact with Tactical Bounding
When you are pinned down and need to cross open space, you cannot move as one unit. You need to use bounding overwatch, where one element of your squad provides cover fire while the other element moves forward. This is the most complex of the best tactical formations for small squad battles in realistic war games, but it is also the most effective way to sustain momentum under fire.
- Assign a dedicated "Cover" team and a "Move" team to avoid confusion during high-stress moments.
- Ensure the cover team has a clear field of fire that does not intersect with the movement path of the second team.
- Communication must be short and direct; use callouts like "Moving" and "Set" to keep the rhythm.
Critical Components for Squad Communication
No formation works if your communication is cluttered with useless chatter. I’ve been using a professional-grade headset paired with software like Discord for low-latency voice comms, and the improvement in my squad's performance was immediate. You need to establish a hierarchy where the squad leader makes the final call, but every member is responsible for reporting threats in their specific sector.
I spent weeks refining our callout system, moving from frantic shouts to concise clock-based directions. A simple "Contact, 3 o'clock, 50 meters" is infinitely better than "They're over there shooting at us!" during a firefight. Practice these callouts during low-intensity moments so they become muscle memory when the pressure is on.
Common Pitfalls and How to Fix Them
The biggest issue I see is players staying in a formation even when the situation has devolved into chaos. If you are taking heavy casualties or are pinned in a compromised position, break the formation. The goal is survival and mission completion, not adhering to a textbook; knowing when to disperse and regroup is just as important as knowing how to form up.
My advice is to designate a "rally point" before you even enter a high-risk area. If the squad gets separated, everyone knows exactly where to regroup without needing constant direction. This simple prep work saved my team countless times, and it is a habit that differentiates a veteran player from a novice.