How To Properly Calibrate Your Mouse And Keyboard For First-Person Shooter Games
Mastering Aim: How to Properly Calibrate Your Mouse and Keyboard for First-Person Shooter Games
I remember the first time I loaded into a tactical shooter, convinced that my shiny new gear would instantly make me a pro player. Instead, I spent the first thirty minutes embarrassingly flicking my reticle three feet past every enemy because my sensitivity was set to a ridiculous 4000 DPI. That day, I learned the hard way that high-end hardware means absolutely nothing if you do not take the time to properly calibrate your mouse and keyboard for first-person shooter games. It is not about buying the most expensive sensor on the market; it is about building a consistent, reliable connection between your hand and the digital world.
My journey into true aim consistency started after I spent a frustrating afternoon tweaking settings for hours on end, only to realize I was fighting against Windows mouse acceleration the whole time. You might think your muscle memory is the issue, but if your software settings are fighting your hardware, you will never develop the consistency required to climb the ranks. Let's walk through how to strip away the unnecessary noise and get your setup dialed in for pure performance.
Understanding DPI and Sensitivity for Precision
The most common mistake I see friends make is confusing DPI, or Dots Per Inch, with actual in-game sensitivity. When I unboxed my Logitech G Pro X Superlight, I assumed higher DPI meant more precision, so I cranked it up and wondered why my aim felt jittery and uncontrollable. DPI is actually just a measure of how sensitive your mouse sensor is to movement, while your in-game sensitivity is a software multiplier applied to that raw data. For tactical shooters, I eventually settled on a lower, more controlled 800 DPI, which gives me enough resolution without making the cursor impossible to navigate on my desktop.
You should view your DPI as your hardware baseline and your in-game setting as your fine-tuning knob. I spent about 10 hours of dedicated aim training time just to find a "sweet spot" where I could comfortably do a 180-degree turn without lifting my mouse too often, yet still track targets at long range. If you are struggling with micro-adjustments, try lowering your DPI and gradually increasing your in-game sensitivity until it feels natural. This two-part approach prevents the sensor from interpolating movement data, ensuring that every inch you move your hand translates to a predictable distance on your screen.
The Hidden Impact of Mouse Acceleration
Windows has a setting called "Enhance pointer precision" that is the absolute enemy of any competitive gamer. When I first started playing shooters, I kept this enabled because it felt comfortable for browsing the web, but it made my aiming feel wildly inconsistent during intense combat. Acceleration means your cursor moves faster the quicker you move your mouse, which is the exact opposite of what you want when building muscle memory. You need your brain to know that "X" distance on the pad always equals "Y" distance on the screen, regardless of how fast you move.
Disabling this setting in Windows control panel was the single most impactful change I made for my accuracy. At first, it felt like my mouse was sluggish and heavy, and I felt like I was playing through molasses for about two days. However, once my brain adjusted, I noticed that my headshots became intentional rather than lucky accidents. If you are serious about improving, turn off acceleration immediately and commit to the transition period, as your future self will thank you when your crosshair placement becomes pinpoint accurate.
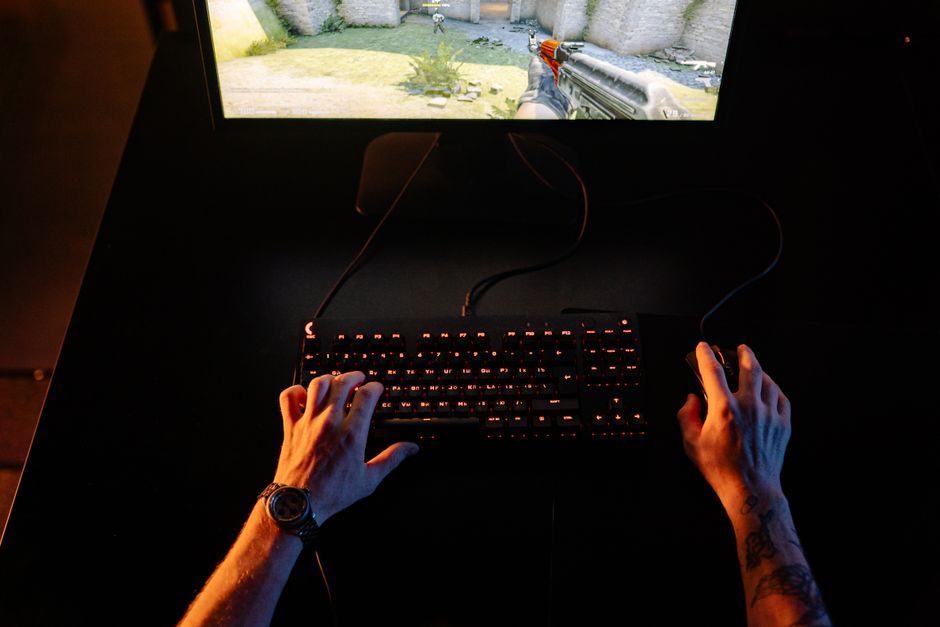
Keyboard Ergonomics and Keybinding Efficiency
Most players treat their keyboard as an afterthought, but your movement and utility usage are just as critical as your aim. When I set up my compact 60% keyboard, I realized that I had been keeping my hand at an awkward, cramped angle that caused wrist fatigue during longer sessions. I moved my keyboard to a slight diagonal tilt, which allows my wrist to stay in a neutral, relaxed position while my fingers naturally rest on the WASD cluster. This small physical adjustment, combined with binding my most important utility items to side mouse buttons, significantly reduced my reaction time.
You want to minimize the distance your fingers travel to perform essential tasks during a chaotic fight. I suggest evaluating your current layout and considering these optimizations for a more fluid experience:
- Bind your most frequently used abilities to easily accessible mouse side buttons to keep your movement keys free.
- Use a keyboard tilt that keeps your forearm aligned with your mouse pad to prevent long-term strain.
- Experiment with "spacebar" jump settings or alternatives like mouse wheel down if you frequently perform bunny-hopping or complex movement.
- Ensure your keyboard is positioned far enough to the left or right to provide maximum surface area for your mouse hand.

Refining Your Settings Through Practice
Once your hardware and software are correctly configured, you need a structured way to test these settings under pressure. I often see players constantly changing their sensitivity after a single bad match, which completely destroys any chance of developing muscle memory. I’ve been using aim-training software for 30 minutes before every session to specifically calibrate my eyes to my current settings. If I find myself consistently undershooting targets, I make a very small adjustment of 0.01 to my in-game sensitivity and stick with it for at least a week to see if it holds.
Your goal is to reach a state where you are not thinking about your mouse movement at all. If you have to consciously adjust your aim, your settings are not yet optimized for your physical habits. When I tested my current setup, I looked for a sensitivity that felt fast enough to react to a target behind me, but slow enough that I could keep my reticle on a moving target at 50 meters distance without shaking. Finding this balance requires patience, but it is the only way to ensure your hardware is working for you, not against you.
Common Setup Pitfalls to Avoid
The biggest mistake I made when I started was buying a massive, ultra-fast hard mouse pad while using a relatively high sensitivity. I was sliding all over the place and could not stop my crosshair on a target, which made me feel like my mouse sensor was broken. I eventually switched to a control-focused, slightly textured mouse pad that provided just enough friction to help me stop my hand movements abruptly. You need to consider how your mouse feet interact with your pad; if you have a very fast pad, you might need a heavier mouse or a slightly lower sensitivity to compensate.
Another overlooked aspect is the physical space on your desk. I once played on a cramped desk where my elbow would constantly hit a stack of books, and I didn't realize how much that was limiting my range of motion until I cleared my space. Give yourself plenty of room to move your arm freely, as you should be using your entire arm for large movements and your wrist only for micro-adjustments. Never try to force a setup that ignores your physical desk constraints, because comfort is the foundation of long-term consistency.

Final Thoughts on Consistent Performance
Calibration is not a one-time task; it is an ongoing process of refining your interaction with your tools. Even after months of using the same settings, I occasionally re-evaluate my grip style and mouse sensitivity based on how my wrist feels after a long week. Remember that the best players are not necessarily those with the fastest reactions, but those who have the most reliable, repeatable movements. By stripping away software interference and perfecting your physical ergonomics, you are taking the most important step toward true mechanical skill.
Take these tips, apply them, and then force yourself to stop tweaking your settings for at least two weeks. Your aim will improve as your brain learns to trust the hardware beneath your fingers. My best advice is to embrace the process and stop chasing the "perfect" setup, as the perfect setup is simply the one you stop changing and start mastering.